MetaMask Wallet User Guide
Download MetaMask Extension
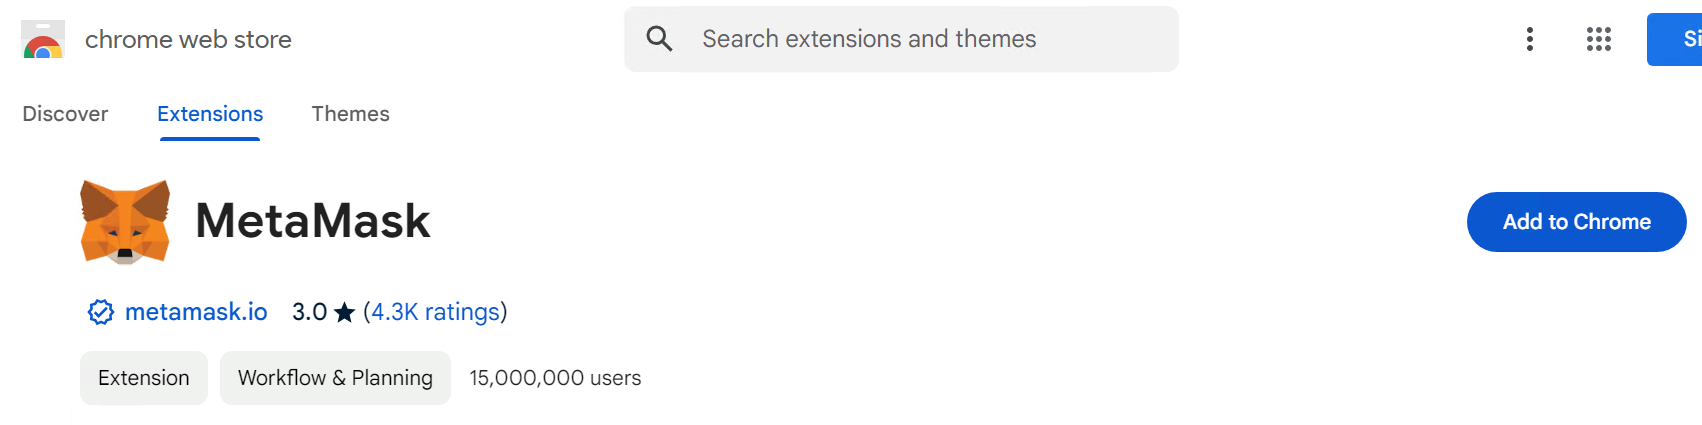
Open your browser and visit the MetaMask official website.
Chrome browser installation example: click "Install MetaMask for Chrome" and follow the prompts to "Add Extension".
Other supported browsers:
After installation, click the extension icon in your browser toolbar to begin setup.
Create MetaMask Wallet Account
- Click the MetaMask extension icon in your browser toolbar to begin setup.
- Select Create a new wallet.
- Follow the on-screen instructions to create a strong password.
- MetaMask will generate a Secret Recovery Phrase. Write down all 12 words in the exact order and store them in a safe, offline location.
- Verify the phrase when prompted to complete wallet creation.
Important:
Your Secret Recovery Phrase is the master backup for your MetaMask wallet. Anyone who has this phrase can control your assets. Creating a MetaMask wallet generates a new wallet backup using your Secret Recovery Phrase. If you later import an account using a private key, that imported account may not be recoverable using the Secret Recovery Phrase of the MetaMask wallet you just created. Make sure you keep a secure backup of any imported private key or maintain access to the original wallet where that account was created.
Never do the following:
- Never share your Secret Recovery Phrase with anyone
- Never enter it into a website
- Never save it in screenshots, email, chat apps, or cloud notes
- Never give it to anyone claiming to be support
Get Wallet Address
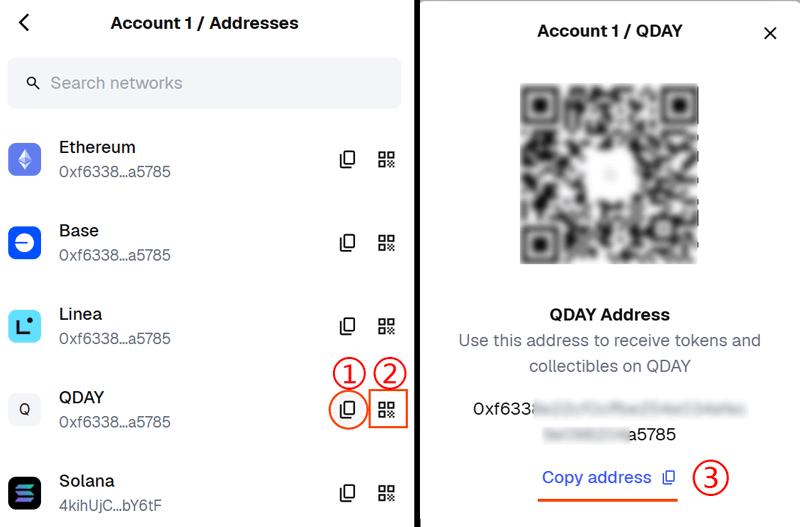
- Open MetaMask.
- Select the account you want to use.
- Click the account name or address area to copy your wallet address to the clipboard.
Note:
Your wallet address is public and can be shared to receive assets.
Safety tip:
Before sending or receiving funds, always double-check the pasted address. Some malware can replace copied wallet addresses in your clipboard.
Add QDAY Network to MetaMask
Automatically Add QDAY Network
- Visit QDay Explorer.
- Click "Add QDay Mainnet" in the upper right corner to add QDAY to MetaMask automatically.
- If MetaMask opens a network approval prompt, carefully review the network details before approving. Verify the following before confirming:
- Network Name: QDAY
- RPC URL: https://rpc.qday.io
- Chain ID: 44001
- Currency Symbol: QDAY
- Block Explorer URL: https://explorer.qday.io
Manually Add QDAY Network
If automatic addition fails, you can add the network manually:
Open MetaMask, click the "☰" menu at the top right, and select "Networks".
Click "Add a custom network" and fill in the following details:
- Network Name: QDAY
- Default RPC URL:
https://rpc.qday.io - Chain ID: 44001
- Currency Symbol: QDAY
- Block Explorer:
https://explorer.qday.io
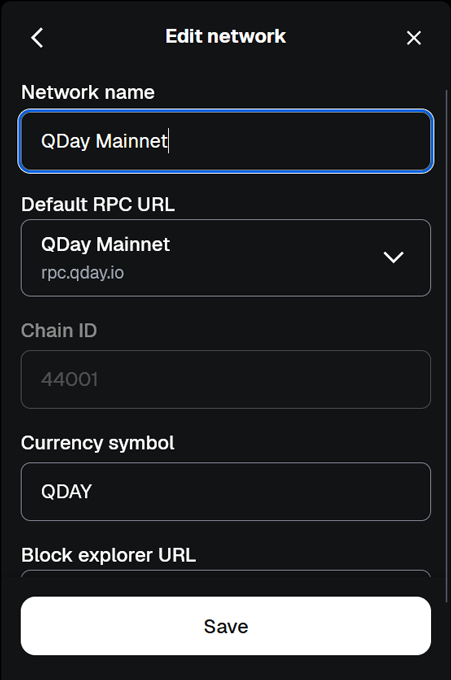
Click "Save" to jump to the QDAY network.
Import QDAY Wallet
First, export the private key of your QDAY wallet from the Abelian mobile app.
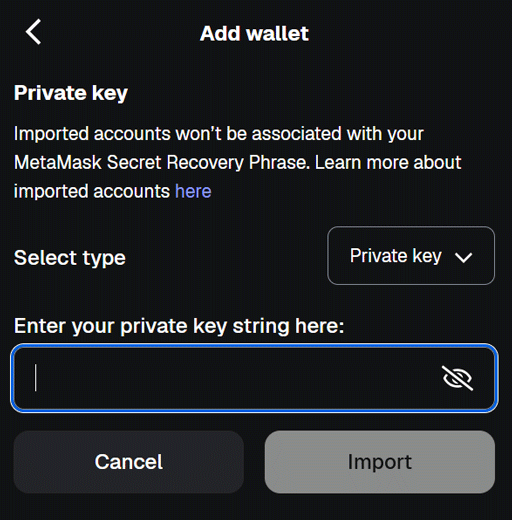
In MetaMask, open the account dropdown menu at the top left and select "Add wallet" > "Import an account".

Select "Private Key", paste your backed-up private key, and click "Import". Your QDAY wallet is now successfully added to MetaMask.
Add ERC20 Tokens to MetaMask
Add USD8 Token to MetaMask
Make sure you are connected to the QDAY network in MetaMask.
Under the "Tokens" tab, click "Import tokens".

Paste the relevant Token Contract Address from the list below into the "Token contract address" field.
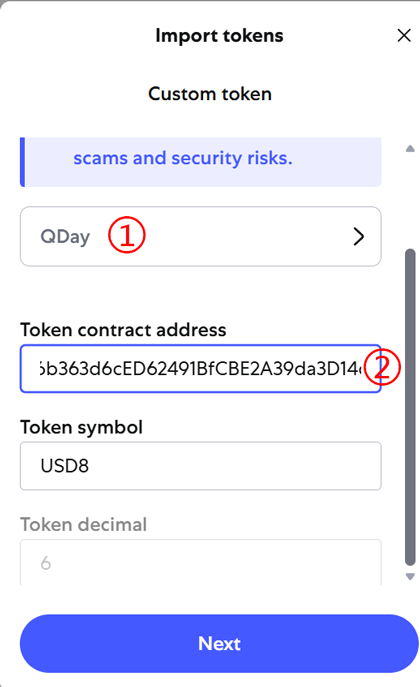
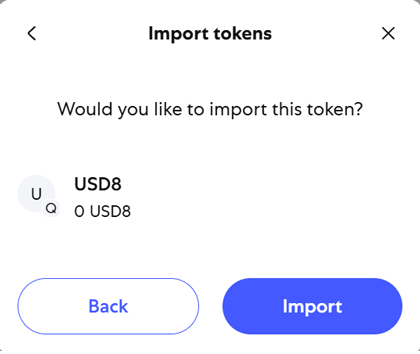
The remaining information will populate automatically. Click "Next" and then "Import".
Add WQDAY and WABEL Tokens
Token Contract Address List
| Contract Name | Token Contract Address |
|---|---|
| USD8 | 0x668FaAFd6b363d6cED62491BfCBE2A39da3D14cB |
| WQDAY | 0xEF253e9FC2d063869FD5B3C0E1c326aB7E030660 |
| WABEL | 0x3a4D0834fe667D780c0fa434Ec9c1c3b08181882 |
Tip: Follow the same steps above to add WQDAY and WABEL tokens to MetaMask.